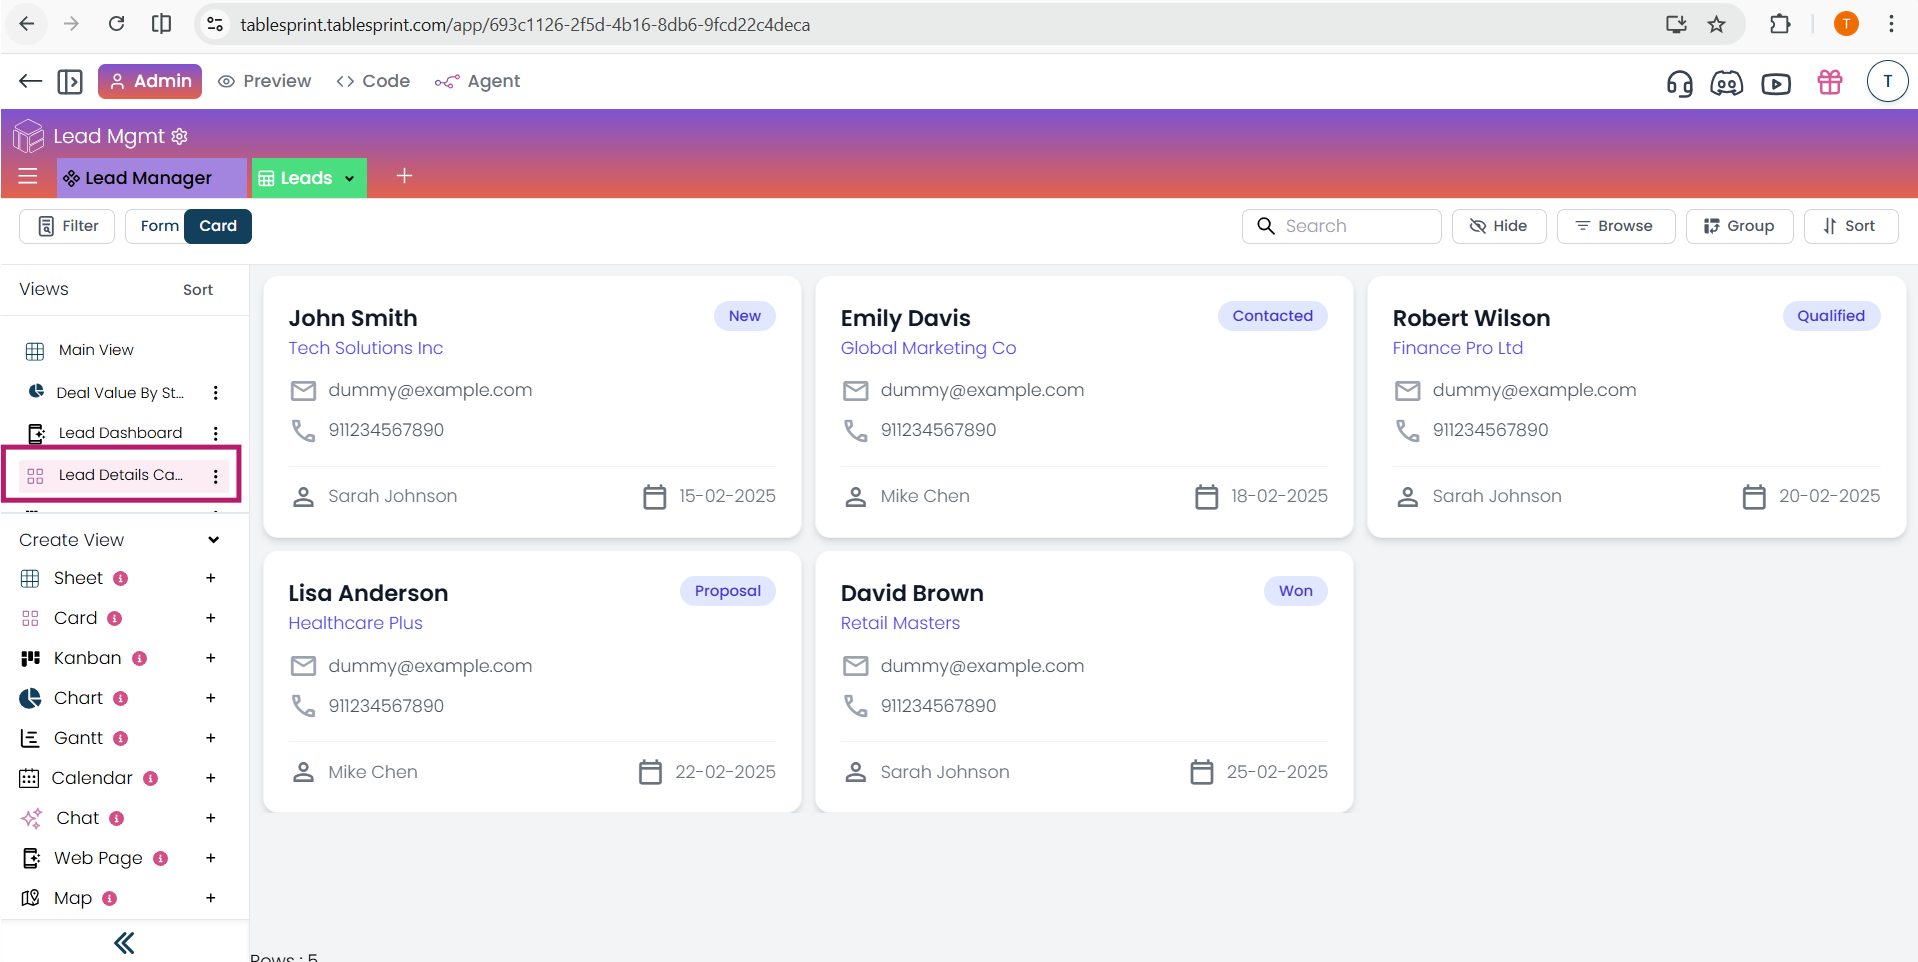
Creating a Card View
This guide will walk you through the step-by-step process of creating a card view. Follow these instructions carefully to successfully create and customize your card view to your preferences.
Steps to Create a Card View Using AI
Open the AI Chat.
Enter a prompt with clear, structured instructions defining the Card View configuration, such as the worksheet to use, fields to display on the card, field order, and layout.
Click Create.

Once the prompt is processed, the Card View is created and opened directly in the View Editor, where you can further customize the card layout, displayed fields, and behavior.
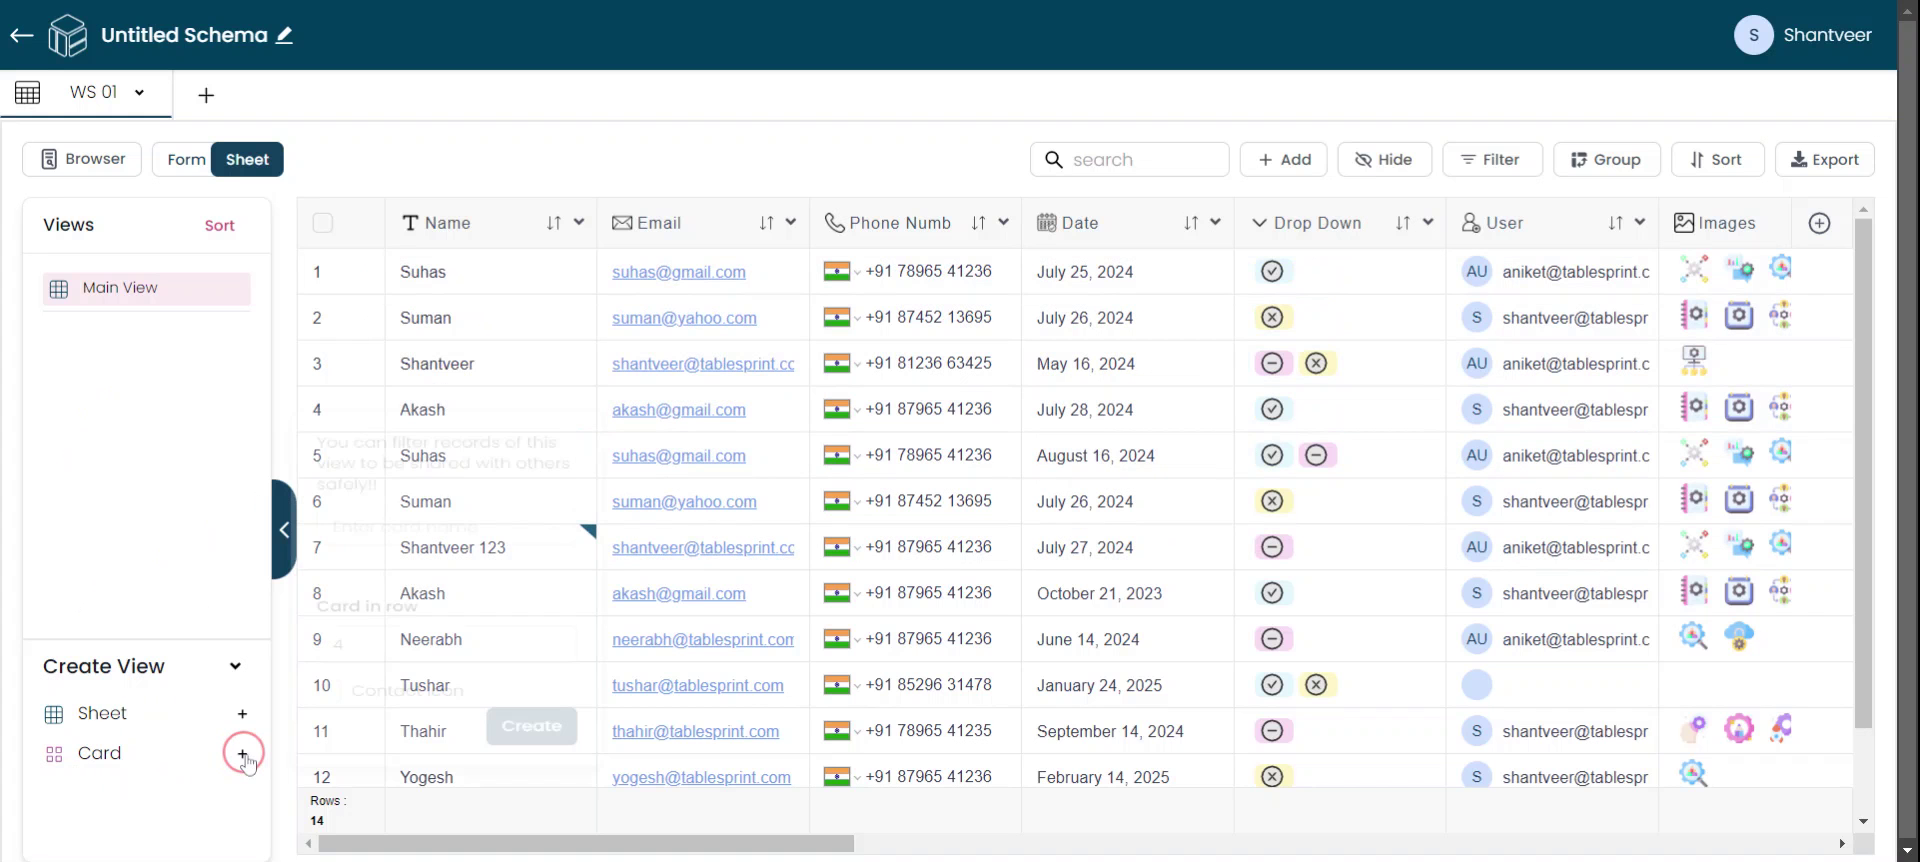
Steps to Create a Card View Manually
Step 1
To start creating a card view, click on the plus icon.
Step 2
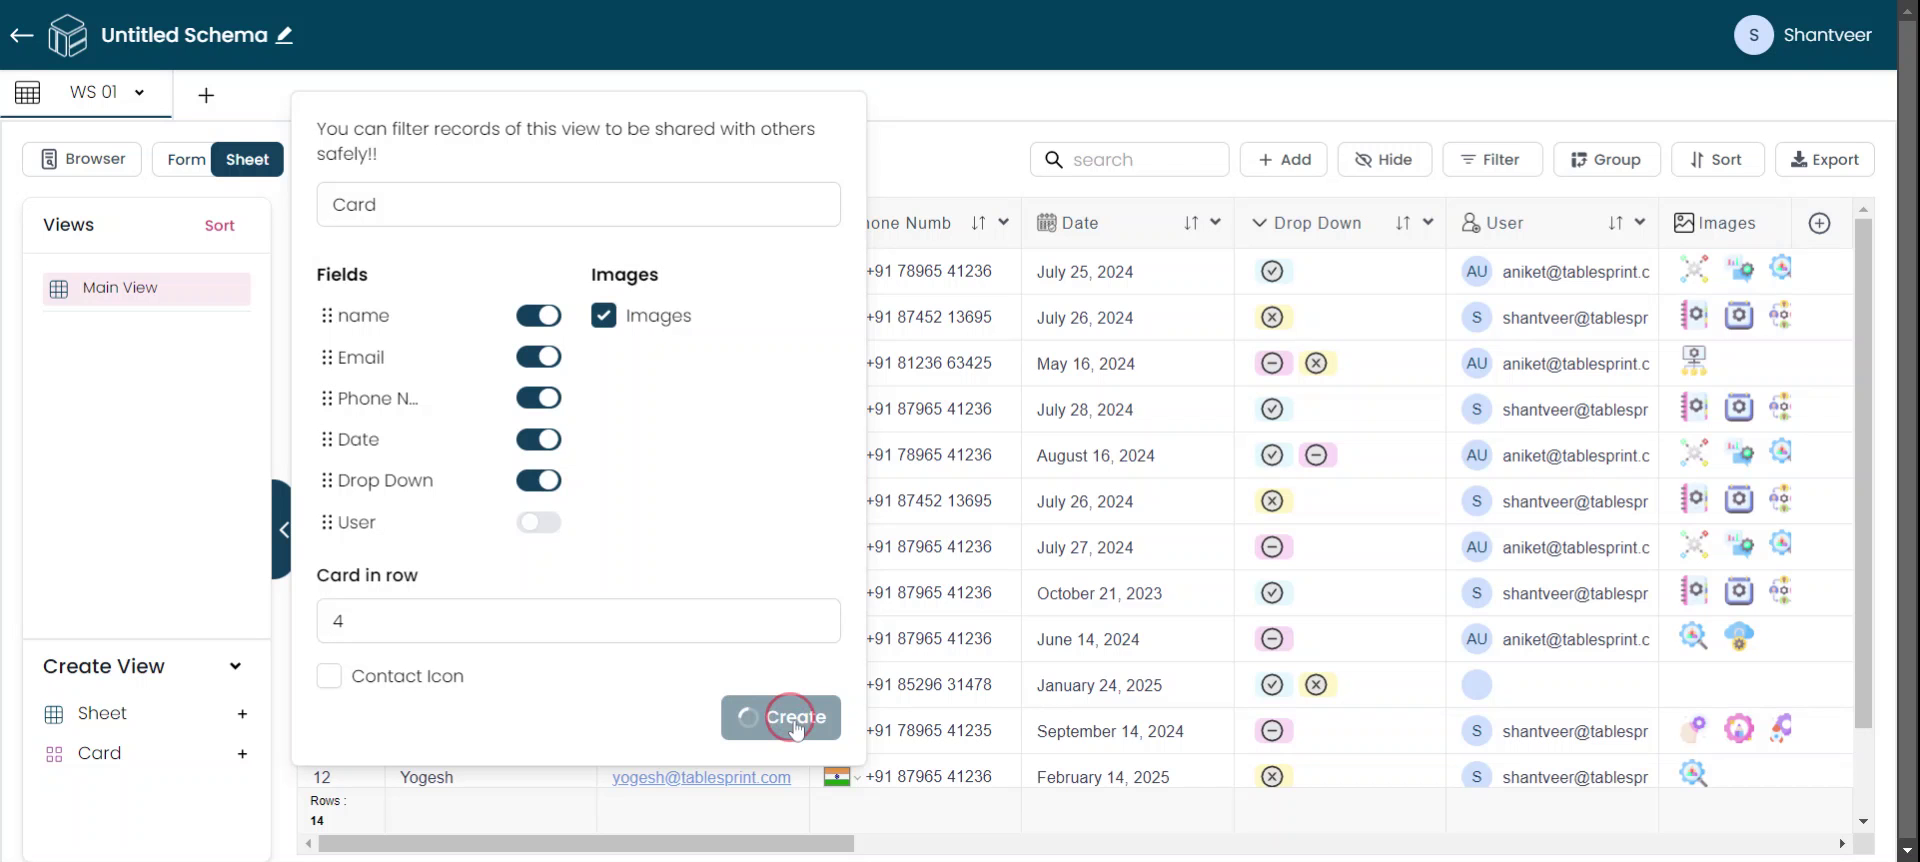
Once the pop-up window appears, enter the name for your card according to your preferences.
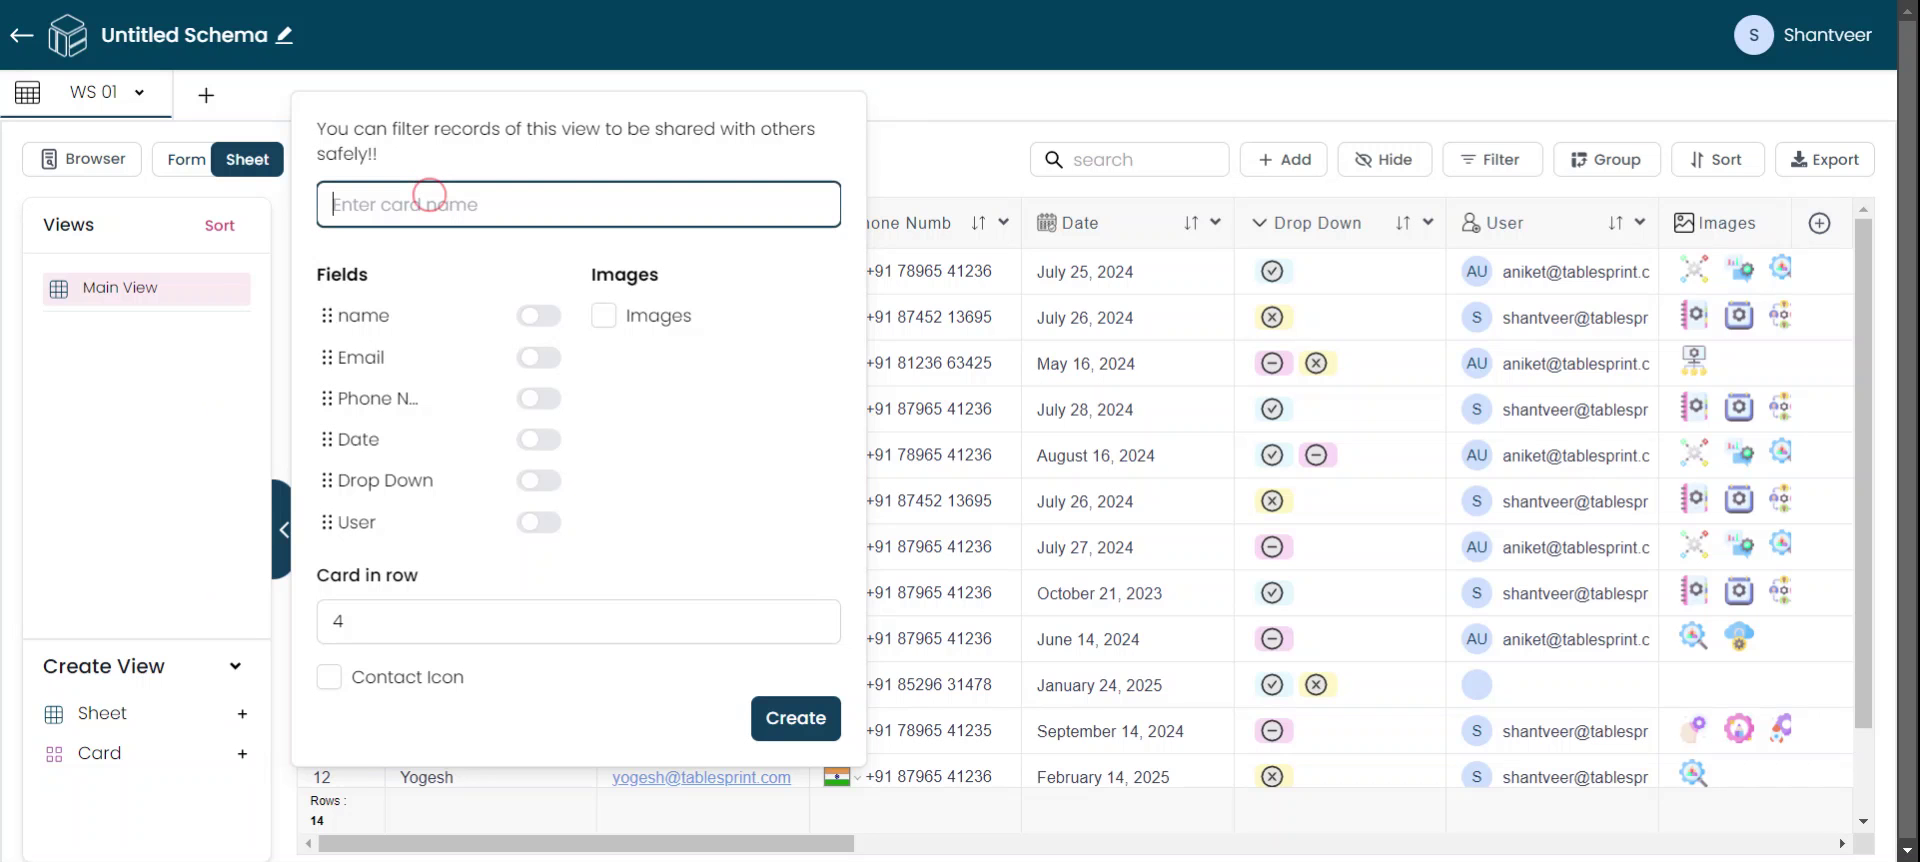
Step 3
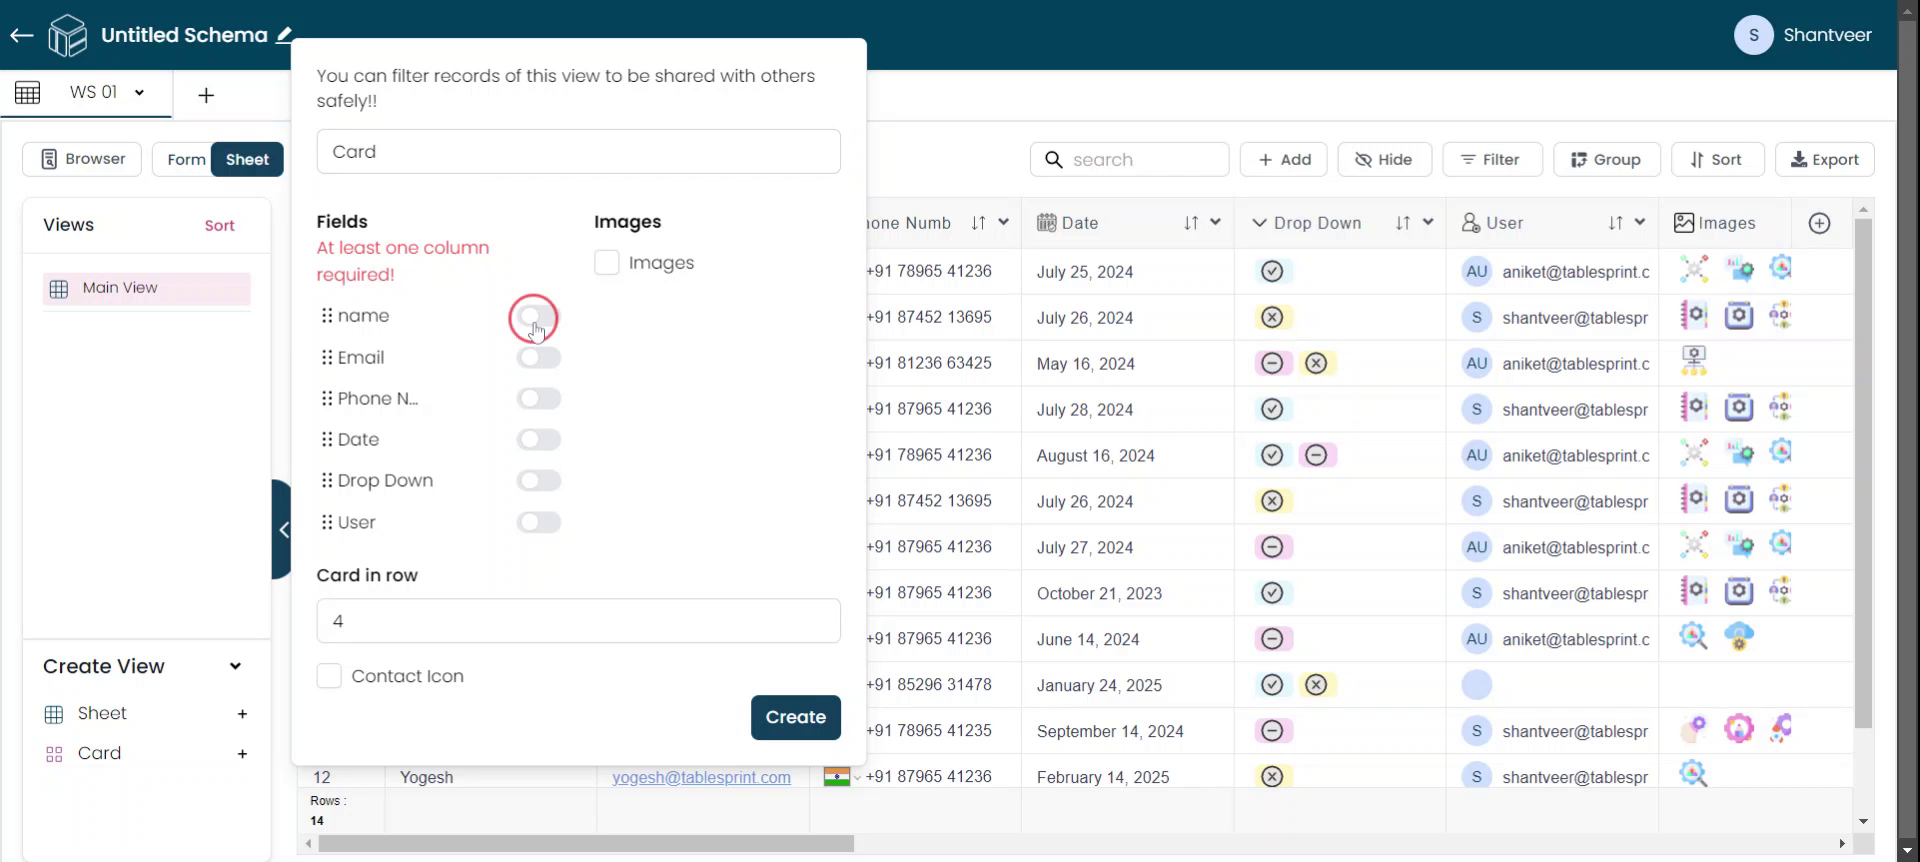
After entering the card name, select at least one field to generate a card view. However, each card includes a 'Details' button that displays all fields. This feature is primarily for design purposes.
Step 4
If you have an image field, you can select the image field if you wish to display.

Step 5
Next, choose the number of cards you want to display in a row when viewed on a desktop. For example, setting it to four will show four cards in a row. After configuring, click on "Create."
Step 6
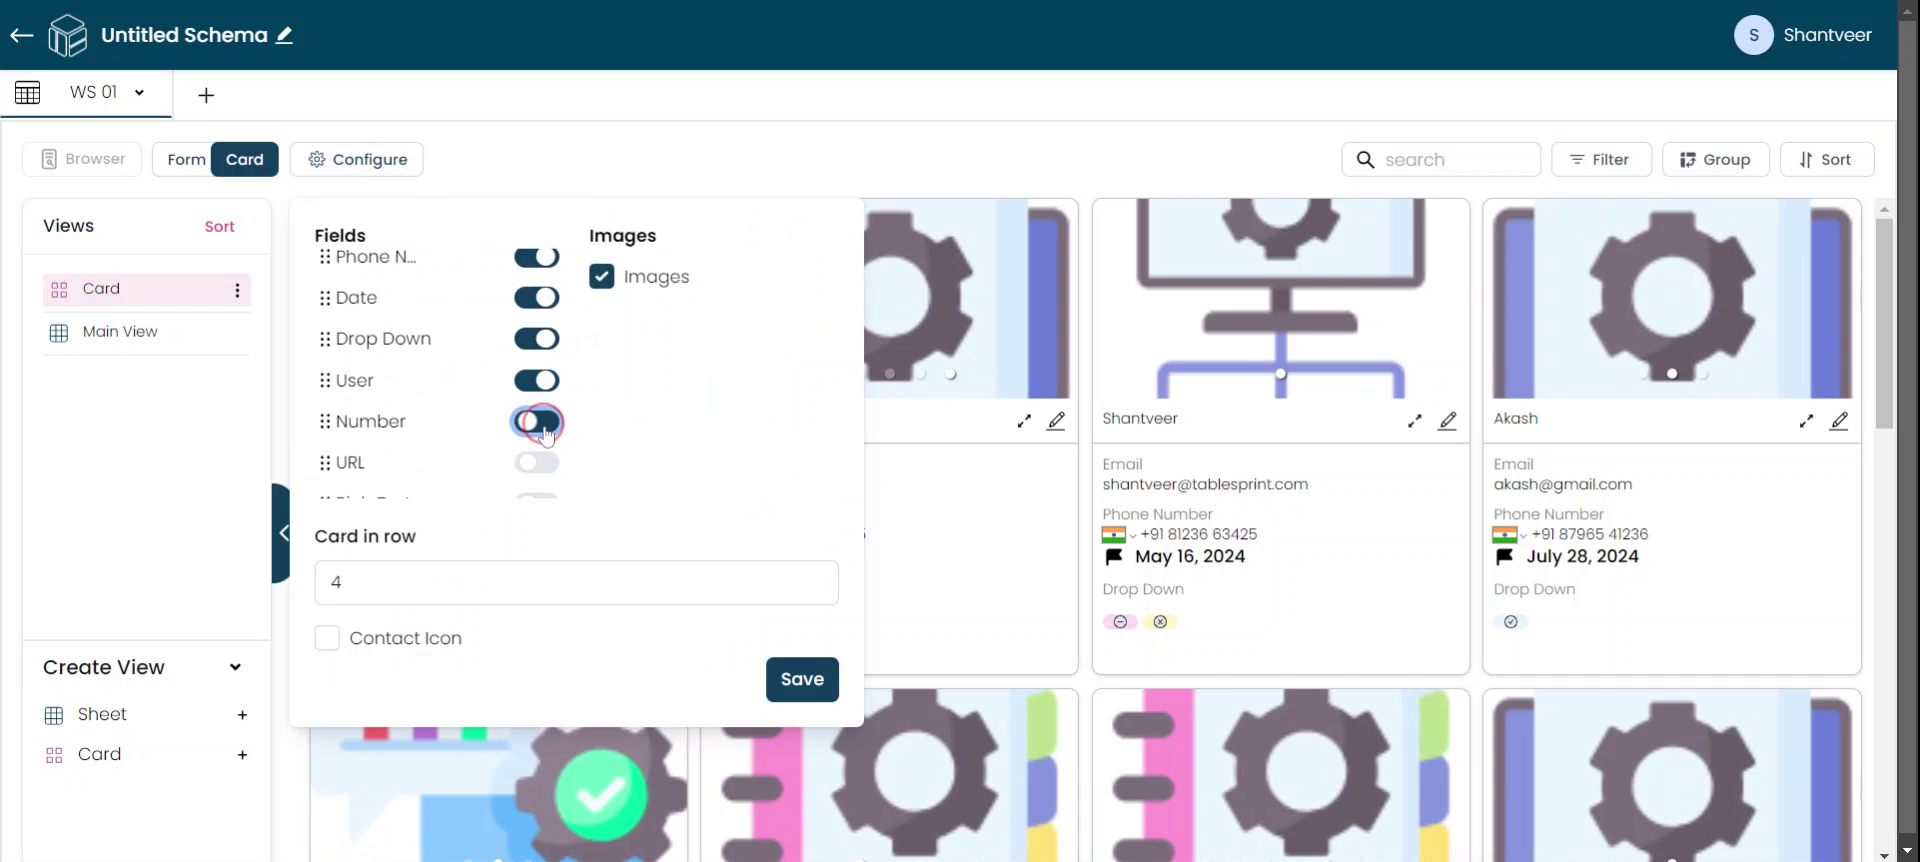
After clicking "Create," your card view will be created. To make any changes in the created card view, click on the "Configure" button. Please note 4 cards are there in a row as set earlier.

Step 7
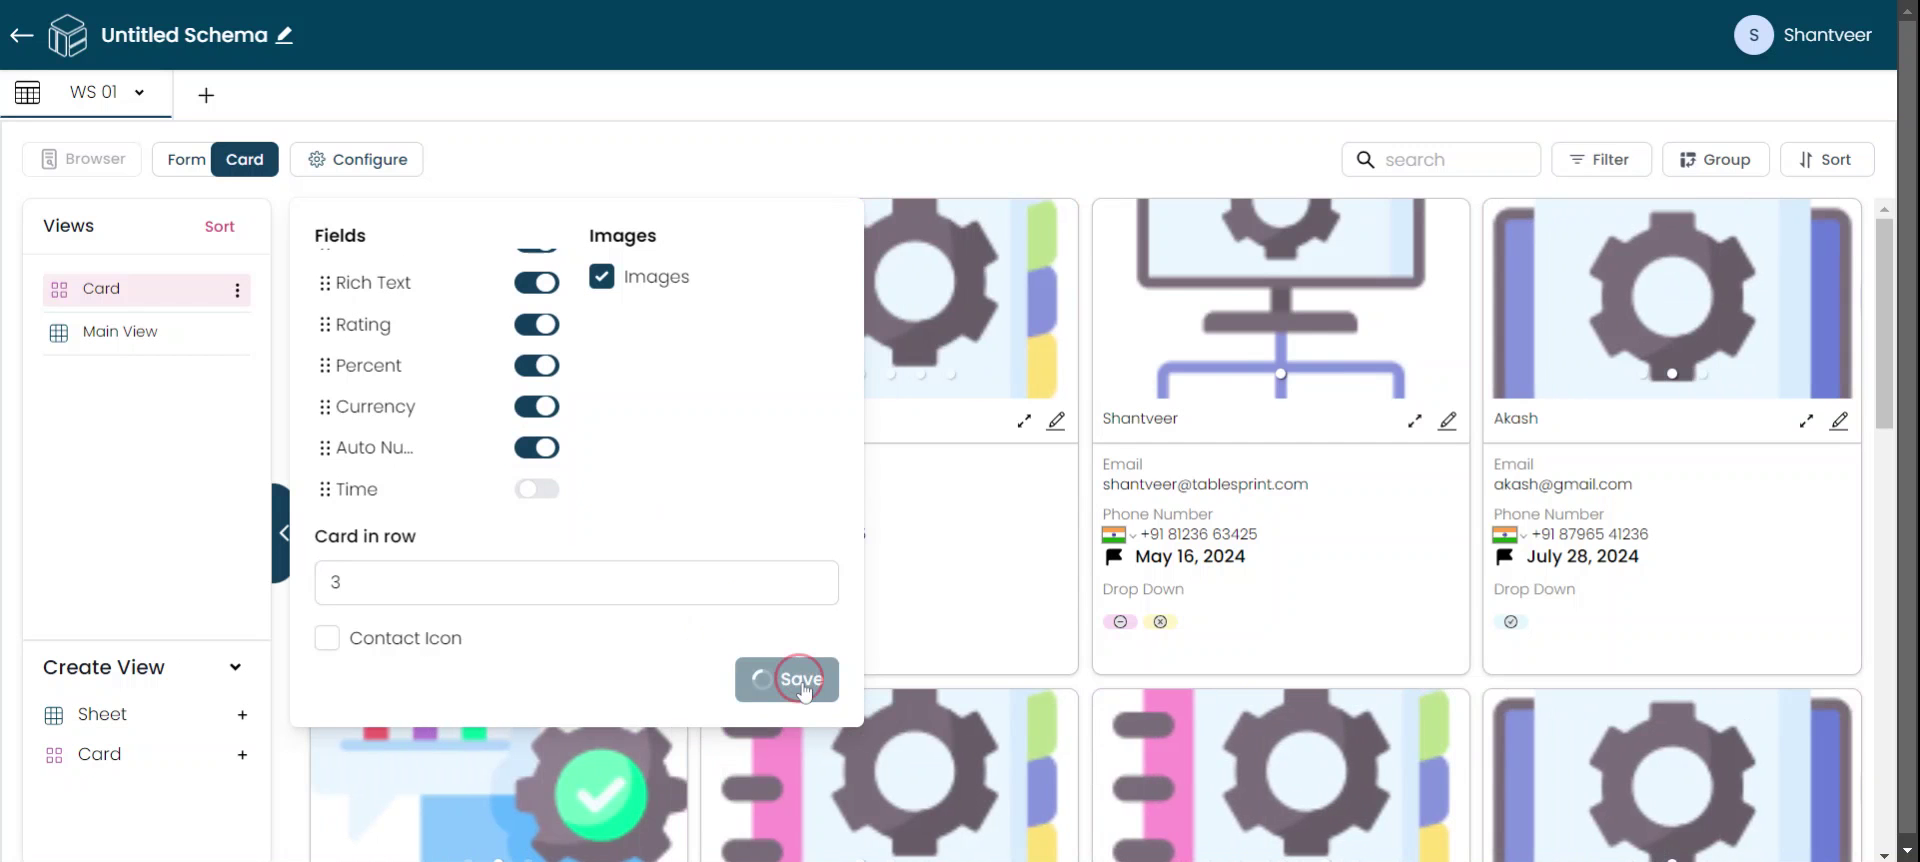
From here, you can add or remove fields, which will be reflected on your cards. And you can also rearrange the fields according to your preference and adjust the number of cards displayed per row.

Step 8
Once you have made the necessary changes, click on "Save."
Advance features of card view like adding a child worksheet button and action buttons will be covered in other tutorials.